Quick Create Admin guide
Administration Guide for Quick Create add-on in JIRA
Where to find Quick Create administration
Where to find Knowledge Base administration
Where to find Quick Create administration
Administration access is required for plug-in settings.
You will find the Quick Create add-on in the administration section of JIRA by pressing dot (".") on your keyboard and typing „Quick create administration". OR Via path: Administration icon ( ![]() ) –> Add-ons –> Manage add-ons (in Atlassian Marketplace section) –> Quick create plug-in –> Configure OR Via path: Administration icon (
) –> Add-ons –> Manage add-ons (in Atlassian Marketplace section) –> Quick create plug-in –> Configure OR Via path: Administration icon ( ![]() )–> Add-ons –> Quick Create Administration (in Quick Create section)
)–> Add-ons –> Quick Create Administration (in Quick Create section)
Quick Create Administration
Open the Quick Create admin page. (g+g Quick Create Administration)
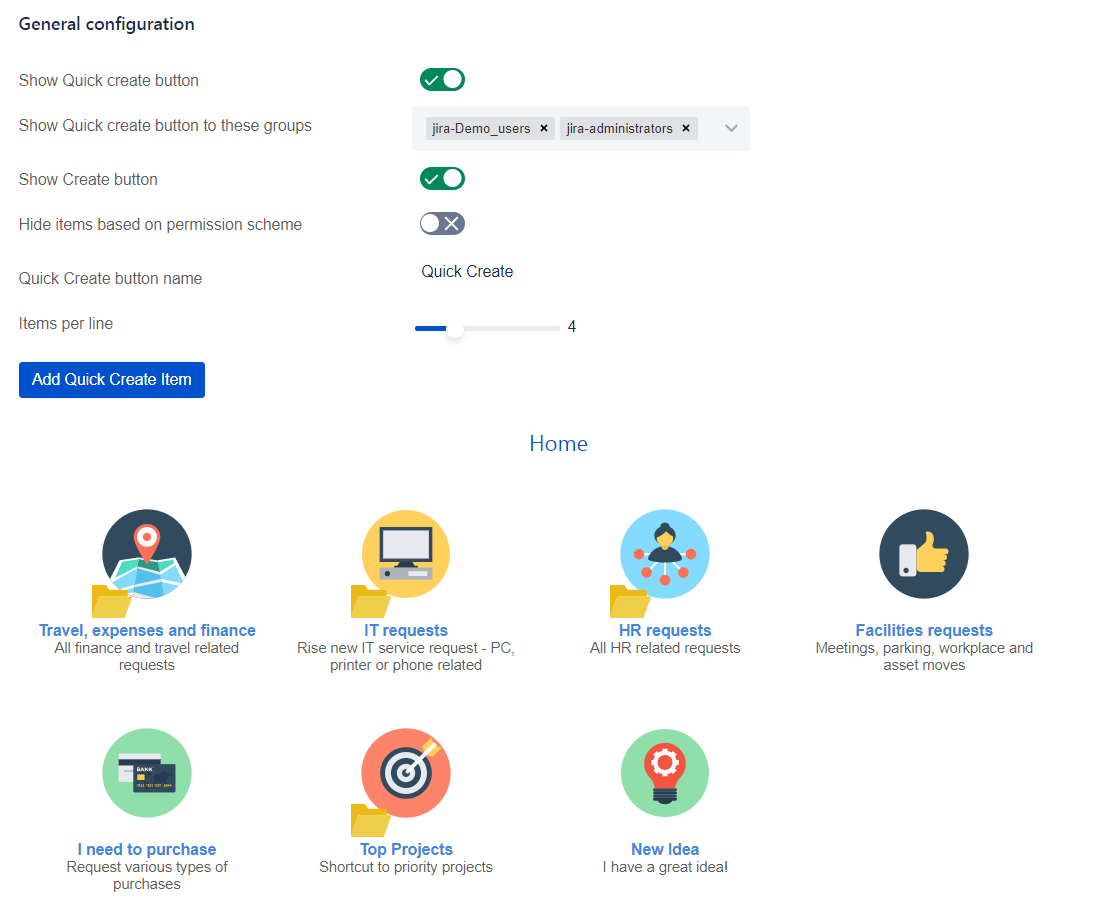
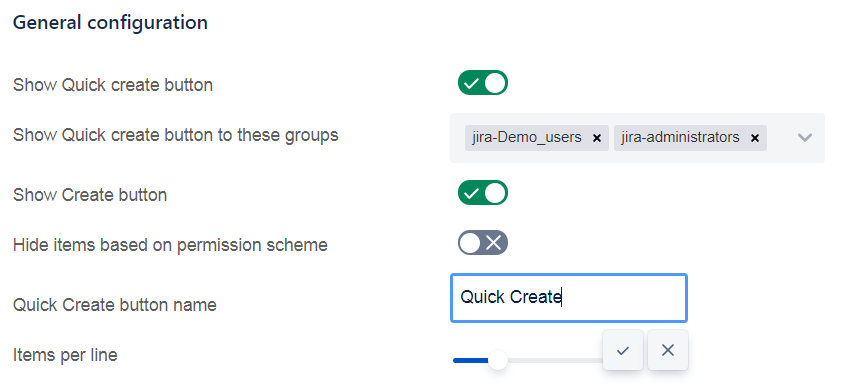
General Confinguration
Under the General Configuration, you can set if the „Quick Create" button is displayed on the user's screen (actually if users can access the function). And you can customize the name displayed on the button.
Example: In our case, the button will be shown on the screen and its name will be „Quick Create".
You can also set the visibility of the original Create button and set, if you want to hide items based on permission scheme (this means that users without permission to view certain project can't see items leading to the project).
Item Configuration
Under General Configuration, you can see existing items. You can create new items, delete, move and edit existing items.

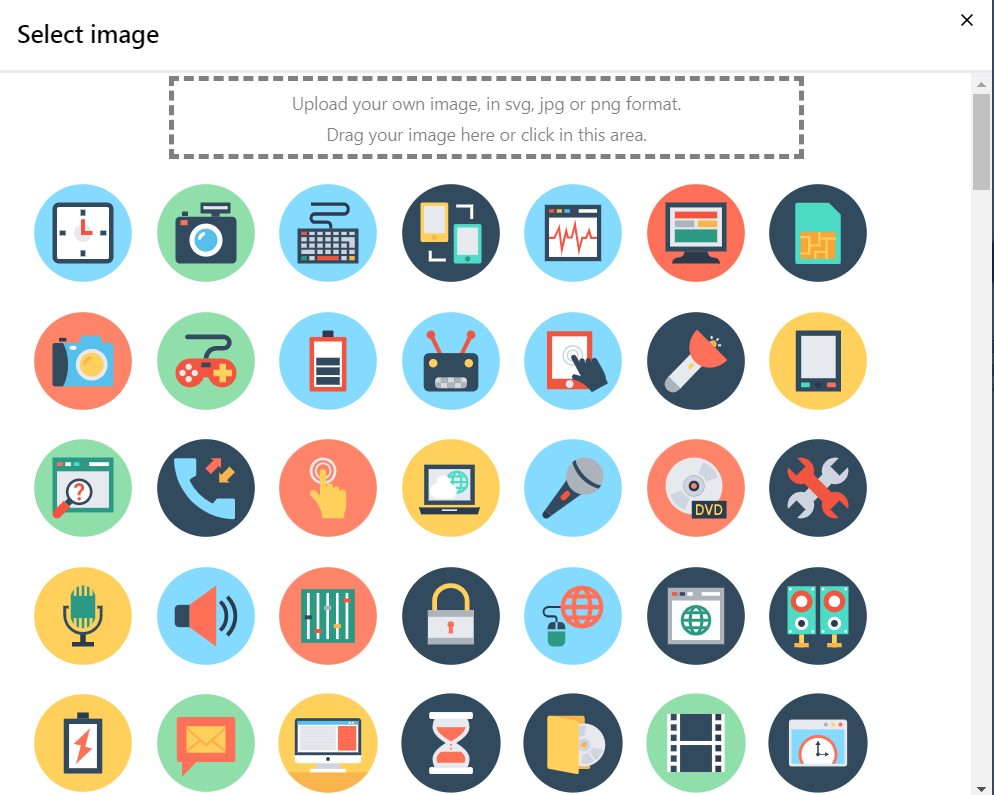
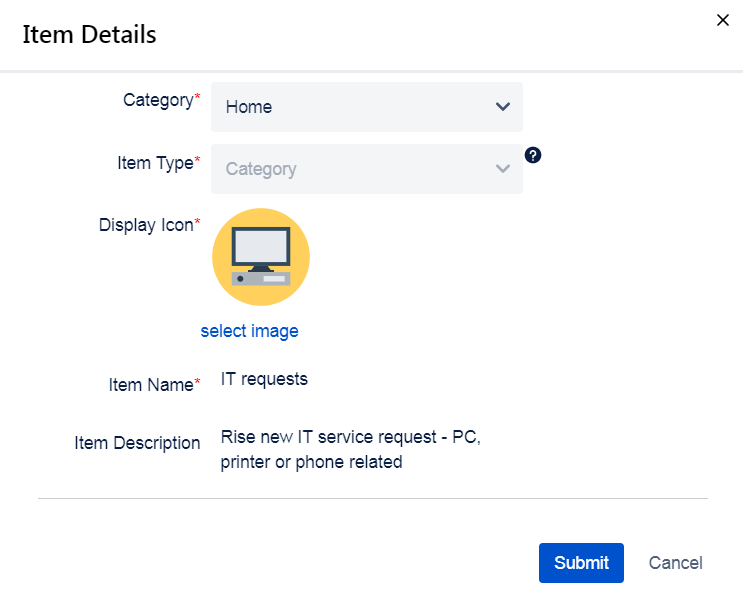
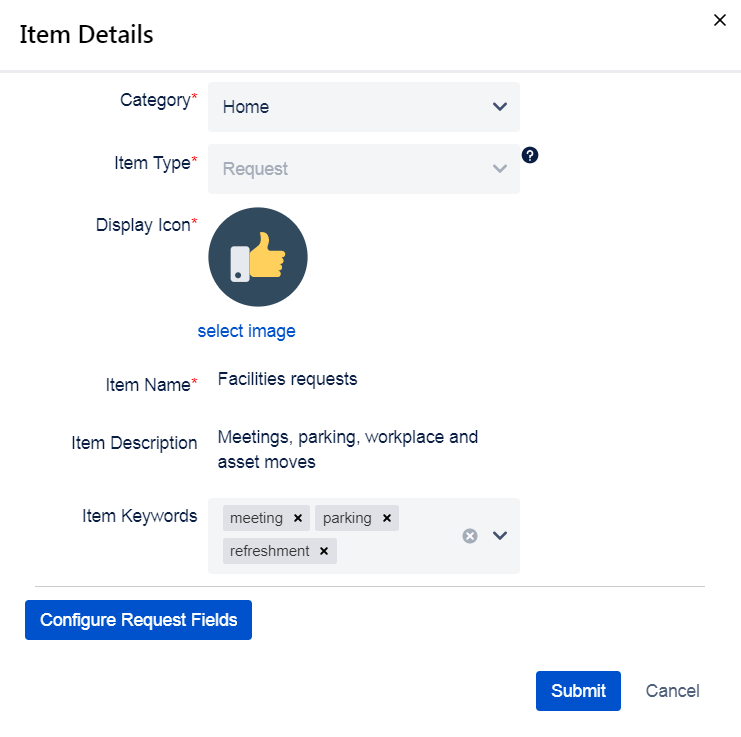
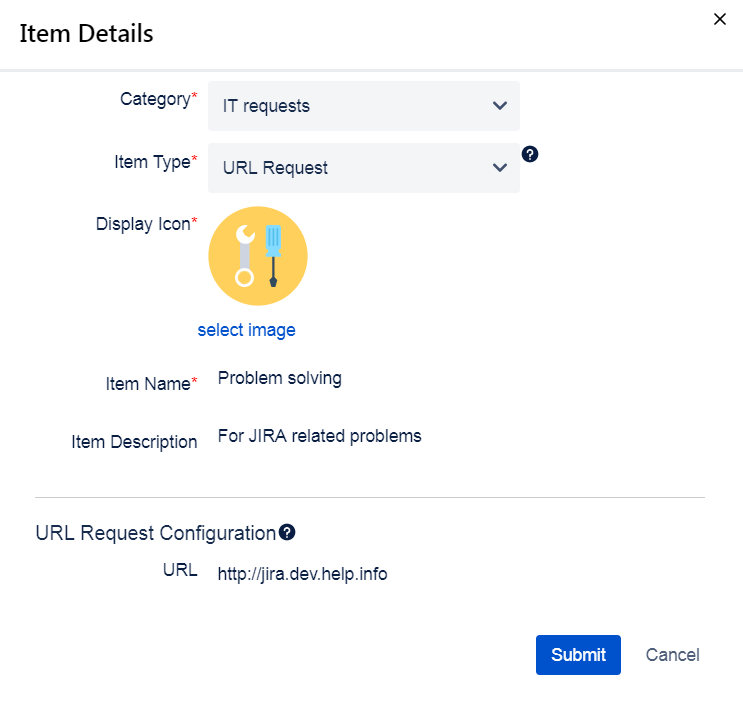
Creating new item: Create new item by clicking on the Add Quick Create Item button. Select item type and details (i.e. Category, Item Name and Item Description) and choose suitable icon from the list or upload your own icon.

There are three types of items you can create:
- Category,
- Request
- URL Request.
Category - creating folders and sub-folders. Fill the mandatory fields and Description (optional). Category aim is to sort Requests in logical areas that help users in intuitive and quick navigation.
Request – creating new JIRAissue. Fill in the mandatory fields plus Description, Project, Issue Type, Summary, Issue Description and Components,which you can find after clicking on "Configure Request Fields". You can also set invisible fields and define default priority.Other issue fields are not pre-defined via Quick Create add-on.
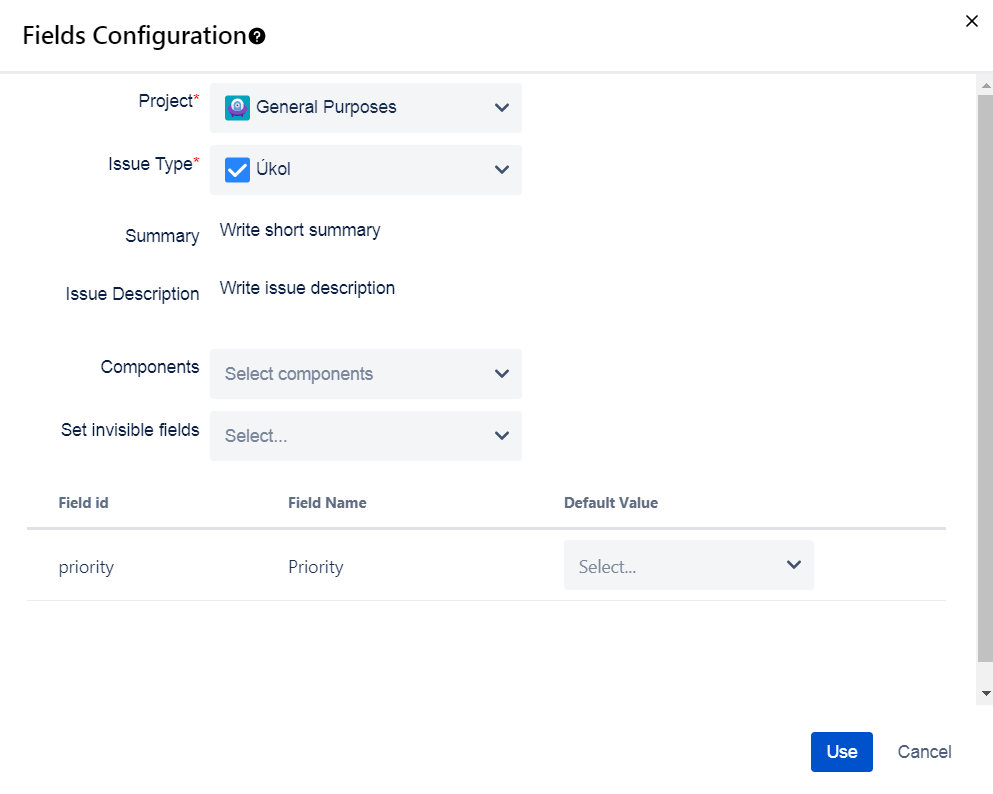
List of supported System fields:
- Project
- Issue Type
- Summary
- Issue Description
- Components
- FixVersions
- Priority
List of supported Custom fields:
- Text-Field,
- Select List( Single choice )
- Select List( Multiple choice )
- Checkboxes
- Radiobuttons
URL Request – creating URL link, which will open in a new tab. Fill in the mandatory fields, Description (optional) and insert URL address.
Create the item with "Submit" button, or cancel it with the "Cancel" button.
Fields marked with * are mandatory, i.e Category, Type, Icon, Item name, Project, Issue Type, URL (in case of URL Request).
Question mark icon (next to Item Type and Request configuration) contains detailed description.
Deleting existing item: Delete existing item by moving your cursor on the item and click on the ![]() icon. A validation dialog box will appear and after confirmation, notification of successful delete will be shown on your screen. In case of deleting a Category, all items within the Category will be removed either, therefore in order to avoid deletion by mistake you will have to confirm two verification windows.
icon. A validation dialog box will appear and after confirmation, notification of successful delete will be shown on your screen. In case of deleting a Category, all items within the Category will be removed either, therefore in order to avoid deletion by mistake you will have to confirm two verification windows.
Translating existing item: Translate an existing item by the  icon within the current category.
Editing existing item: Edit details (excluding the type) of an existing item by the ![]() icon. Changing the item from Request to Category or URL request is although not possible, you need to create a new item.
icon. Changing the item from Request to Category or URL request is although not possible, you need to create a new item.
Where to find Knowledge Base administration
You can find Knowledge Base administration under Quick Create administration on the left menu bar.
Knowledge Base administration

Choose application link - specify which application you want to connect.
Choose space - specify which space you want to extract pages from.
You can also select pages depending on exact labels.
Supported Web Browsers
Microsoft Internet Explorer - version 11.0 not supported
Chrome - Latest stable version supported
Edge -Latest stable version supported
Mozilla Firefox - Latest stable version supported
Safari - Latest stable version supported on Mac OS X only
Mobile
MobileSafari (iOS, iPodtouchand iPhone only) — Latest stable version
Android — The default browser on Android 4.0.3 (Ice Cream Sandwich)
Chrome (Android and iOS) – Latest stable version supported